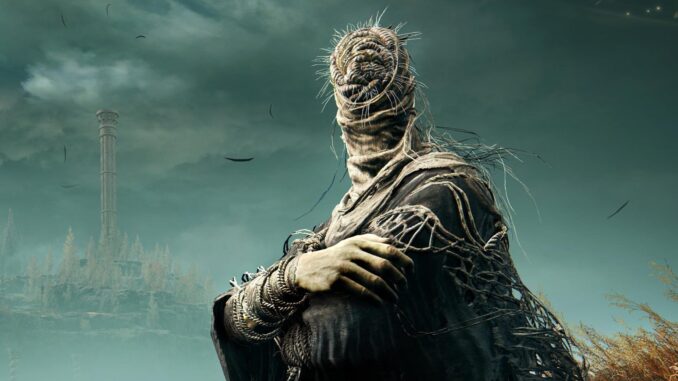
In our Shadow of the Erdtree NPC and Side Quests guide, we break down all the new characters and the quests they offer in the Elden Ring DLC.
Elden Ring Shadow of the Erdtree features a new selection of NPC characters ready to accompany the Senzaluce during his adventure: each of them is characterized in a very deep way, the entire team is inspired by the Berserk Hawk Squad, and each member offers above all the traditional dedicated secondary mission. However, there is an important difference compared to the past: the NPC missions and therefore their destiny will constantly intertwine, putting the player in front of choices that could overturn the outcome of their stories and, in a certain way, also some passages of the main plot of the experience.
Given the complexity of the issue, the nature of the secondary missions but above all the presence of two points of no return that inexorably push the quests forward, we have decided to proceed as follows: in this guide to the NPCs and secondary missions of Shadow of the Erdtree we will begin by talking about the characters and the first encounter with each of them, after which we will analyze the first leap forward of the missions and finally we will deal with the subsequent encounters and the methods of completing the quests.
All NPCs and Where to Meet Them
The peculiarity of the NPCs in Shadow of the Erdtree is that many of them are part of the same company of warriors: a group of people devoted to Miquella who have gone to the Shadow Realm to answer the call of the empyrean, engaged in a pilgrimage whose purpose is a mystery to everyone. This means that bonds and disagreements develop between them that it is up to the protagonist to discover : as players, we could ask each one what they think of the others, answer the requests that involve them and constantly exchange information.

Our main advice is to come back very often to talk to all the characters you have already met, ideally every time you meet a new member or discover something new . Example : near the first Miquella Cross you will meet the Herald of the Horn and Freyja. After talking first with Feyja and then with the Herald of the Horn, you can return to Freyja to unlock additional dialogues .
Let’s now see a complete list of NPCs and their first encounter.
Led

Leda is a Knight of Miquella’s Needle, and is therefore without a doubt the demigod’s most faithful emissary throughout the DLC. Her past is shrouded in mystery, but she is the first one you will meet, even before setting foot in the Shadow Realm. In fact, she will be the one to pick you up at the Altar of Mogh and recruit you into her ranks. After this meeting, however, she will become the last character you will have the opportunity to speak to in person. In fact, you can only find a few of her letters during the first few beats of the adventure, specifically in the following places:
- At the top of Belurat, Tower settlement
- In Ensis Castle, near Miquella’s Cross
The next encounter will be in the form of a Summoning Spirit that you can summon to face the boss of Ensis Castle .

At that point Leda will move to the main place of grace of Altus Ombra , just outside the arena where you fought the boss of Ensis Castle. Leda will remain in this position for most of the adventure, but the appointment is postponed to the second part of the guide, which you can find further down.
Freya

This Redmane soldier is probably the first character you’ll encounter. A member of General Radahn’s royal guard, she remained loyal to the Redmane champion until she joined Miquella’s ranks. You’ll first meet her at the first Miquella Cross in Sepulchre Plains , right after the Furnace Giant that patrols this region. You can chat with her and ask her what she thinks of the Hornbringer.

Freyja can be summoned as a Ghost to defeat the boss of the first Legacy Dungeon in Shadow of the Erdtree: once you reach the top of Belurat, the Tower’s settlement, you will find her summoning sign immediately in front of the area’s boss fog.
If you choose to collaborate with her on this occasion, you can talk to her again next to Miquella’s Cross where you first met her to unlock a series of additional dialogues.
The Herald of the Horn

An enigmatic character who is encountered in the first Miquella’s Cross in Sepulchre Plain, right next to Freyja. He is part of the Horned People , inhabitants of the Shadow Realm who were exterminated by Messmer the Impaler. He now travels as a pilgrim in search of Miquella’s Crosses, and will provide you with Cross Maps that roughly indicate the ones he has already located.
After completing Ensis Castle, the Herald of the Horn will move to Altus Ombra , right next to where you first meet Leda, and will remain here until the point of no return.
Ansbach

This mysterious individual represents the scholar of Miquella’s group : having abandoned the path of combat for some time, he is a researcher who has traveled far and wide throughout the Interregnum and who now finds himself in the service of a new master. You will meet them for the first time next to the place of grace exactly in front of the entrance to Belurat, and again after having made his acquaintance you will be able to talk about him with other members of the company.

This character will maintain this position until reaching the point of no return that we talked about previously and that we will analyze later.
Moore

This is the main merchant and looter of your warrior company: his role is to provide you with all the necessary materials and also some small extra rewards to exploit during your travels. You will meet him right next to Ansbach and he is a particular character: a man of few words who is extremely devoted to what represents his passion, that is, gathering resources for the age and for his companions.
Unlike other characters, he will maintain this position for most of the adventure .
VERY IMPORTANT : Moore works with the Broodlings, the insects that usually – in the base Elden Ring – attack you by throwing their spines at you. Scattered around the Shadow Realm you will find insects of that type that will not be hostile towards you at all: never attack them for any reason! By interacting with them you can obtain exclusive Recipe Books, but if you were to hit them Moore will abandon the company forever , without any possibility of recovering him even by resorting to the Absolution mechanic.
Moore is part of a step of the first request that will be assigned to you by Thiollier , a member of the company that we will introduce shortly. Thiollier will ask you to recover some ingredients from Moore: all you have to do is tell him about the sorcerer’s request and complete the mission.
Thiollier

This character is a great expert in infusions, poisons and so on who finds himself in the service of Miquella despite not seeming to have a great relationship with the rest of the company. In fact, he is met very far from the other members of the group.

You can meet Thiollier in the Eastern section of the Sepulchre Plains . After crossing the Great Bridge over the Ellac River, climb up the promontory to the south and keep your gaze turned towards the east: you will reach a small strip of land, in the image above, on which sits a Cross of Miquella next to which Thiollier is standing. Here you will finally be able to make his acquaintance.
Thiollier offers a small preliminary mission: he will ask you to go to Moore and collect the ingredients for an infusion he is preparing. Once you have collected the goods, all you have to do is deliver them to Thiollier and rest at the place of grace to make time pass forward. At that point you can talk to him to recover a particular bottle of very powerful poison by answering him: “I don’t want to live anymore”. And that’s all for now.
Dane Deadleaf

The last member of the company that you have yet to meet is the monk, practically the beating heart of the group together with Leda , the most convinced of the mission. Dane does not speak because he has created a void of silence, but he will express himself very often through messages that you can find around the Kingdom of Mmbra. The first one you will find is the “Monk’s Message” which is located exactly next to Leda in the first place of grace of Altus Ombra. Reading the message, you will discover that it awaits you to the east.

The place where you can actually meet Dane is near the ruins of Moorth Village , not far from the grace of Altus Ombra. In this place you will also have the opportunity to challenge him to a duel to obtain the monk’s melee weapons . Use the “May the best man win” emote that you found with the Monk’s Message in front of him : once the challenge is won, he will abandon this position.
Characters Outside Miquella’s Company
Belurat’s Hag

The Crone is the only sane survivor of the Horned People and still lives in her old city, Belurat, the Tower Settlement. Since her people were exterminated by Messmer, she harbors a visceral hatred towards the demigods and the Lightless One. She places her greatest trust only in the Dancing Beasts of her people.

To meet this sweet old lady, all you have to do is reach Belurat’s Warehouse, a room located right next to the second place of grace in this dungeon, namely “Small Private Altar” in the photo above.

To enter the room I will need a key, the Warehouse Key, which can be found hidden in Belurat in a room right next to the golden river, indicated in the photo above.
Once you defeat the main boss of Belurat , you can equip his helmet, the Divine Beast’s Head , for a unique interaction that rewards me with the Keepers spell. Additional interactions will become available later, which we’ll talk about in due course.
Igon

Igon is a derelict character you can meet in the eastern section of the Sepulchre Plains, after the Grand Bridge over the Ellac.

You’ll find him along the path in East Sepulchre Plains that leads to the Dragonpit , a small dungeon that’s located at the southern end of this particular region. You can’t do anything with him at this time, and we’ll look at him more in the next section.
Priestess of the Draconic Communion

This priestess of the Cult of the Dragon is a follower of the Ancient Lord Placidusax who can be found beside the Great Altar of Draconic Communion located in the Jagged Peak region .

To reach it, you just need to proceed near where you met Igon until you reach the Dragon Pit dungeon and go through it to the end to arrive in the new region. If you want more details, you can take a look at the guide to the secret areas of Shadow of the Others or maybe even that of the complete solution. This character will remain here for the entire duration of the adventure and will provide you with information about everything you could want to know about dragons.
Count Ymir, Prelate

A Carian sorcerer and leading exponent of the Cathedral of Manus Metyr , this character will be your primary window into the world of Sorcery throughout Shadow of the Erdtree, but that’s only the surface of his character.

To reach it and to reach Manus Metyr, you need to take a fairly complex tour of Altus Ombra, shown in the photo above: starting from the Ruins of Moorth, you have to go through the underground passage in the center until you reach Bonny Village. At this point, all you have to do is go up the woods to the top of the promontory where the cathedral awaits you.
In terms of Elden Ring’s narrative, the quest it offers you is by far the most important in the entire add-on content .

From the first meeting this character will give you a mission : he will give you a particular necklace and will ask you to ring a bell located in the center of very particular ruins that he will indicate to you on a map drawn for the occasion. The ruins he speaks of are the Ruins of Rhia’s Fingers that can be found in the Jagged Peak region .

You can easily complete this first step of the quest on your own: every time you ring a bell as requested by him, his inventory of Sorceries for sale will add new items to the collection.
Optional interactions : Once you return from your pilgrimage, the Count may move to the cemetery area, effectively leaving the throne in the cathedral unguarded. This will give you the opportunity to interact with the throne to reveal a secret area. Our advice is not to do this: try to overcome your curiosity and not interact with the throne. Not so much because something bad would happen, but because this mission offers several endings that could be compromised by making this choice.
In the next section we will analyze in detail the continuation of his quest.
Jolan

Count Ymir is accompanied by a Night Knight who is in his service. Her lines of dialogue are very dry, but if you interact with her often she may reveal something about her past and open a series of exclusive dialogues whose consequences will be discussed in the second part of this guide.
Yes, there is a column leaning right next to the throne in the cathedral, but due to the very low lighting in this area and its elusive nature, it is very easy to miss, so pay attention to your surroundings as you venture through Manus Metyr. Many events occur in the Cathedral throughout the game, so be sure to check back often.
Queenelig

Queelign will appear to you as an invading NPC from your first visit to Belurat, in the small courtyard indicated by the image above. He is a crusader loyal to Messmer and Marika who has made extermination a real obsession.

Queelign will invade you again in the Crusade Church in Altus Ombra the first time you reach it. Defeating Queelign both times will give you the Prayer Hall Key , an essential item for interacting with him that we will cover in the quest section.
Shadow of the Erdtree has a point of no return where all the quests actually start: the reason we decided to split the guide into two parts is to protect from spoilers anyone who just wants to find the NPCs and then try to tackle the quests alone. In the next paragraph we will talk in detail about the point of no return and its consequences, after which we will actually analyze the NPCs and their side quests.
FIRST POINT OF NO RETURN

In our Shadow of the Erdtree walkthrough, we talked extensively about the point of no return that you pass in the Altus Ombra region. In the image above, inside the red squares we have marked out a space that, once explored, triggers an in-game event . If, for whatever reason, you were to pass the boundaries of these red squares, you will arrive at the first point of no return in the DLC.
What does it mean? Unfortunately, to explain what is happening we must necessarily talk about it openly. As soon as you approach the Fortress of Shadows , a noise and a signal on the screen, with a written message, will warn you that Miquella has just given up her Greater Rune, losing her powers . This has led to the dissolution of any kind of spell cast by the empyrean, bringing heavy consequences.
All the characters you have met up to this point were in fact victims of a spell by Miquella that forced them to side with her. Now that the spell has been broken, your companions have returned to being masters of their own conscience, becoming different people from those you have known up to this point . This means that they are now free: we strongly recommend that you take a good walk to talk to each of them. From now on , the real guide to the characters and secondary missions will begin .
The Real Guide to NPCs and Side Quests
From this point on, NPC missions will intertwine and have effects on each other: our guide will be mainly based on the survival of all characters , but we will list all available options separately.
We’ll start with the characters we’ve already solved 100%.
Ansbach

Ansbach is actually a devoted follower of Mogh, Prince of the Blood from whose altar you reached the Shadow Realm. For this reason he will distance himself from the company in order to seek information about his master and especially about the real intentions of Miquella, since her destiny seems intertwined with that of the omen.
- The next encounter with Ansbach takes place in the Specimen Storehouse in the Fortress of Shadows , the second part of the legacy dungeon. The photo above shows the location of the room where you can find Ansbach.

- The scholar is looking for information about his lord Mogh but can’t figure it out, so you should be the one to help him by bringing him a scroll hidden further on in the dungeon , to be precise in a room that can be reached by following the path indicated in the photo above, while below you can see the scroll.

- Once you have delivered the parchment to Ansbach, go to him and thank him, he will say he is in your debt, he will choose to put himself in your service, declaring that he will ally himself with you during your adventure and so he will do.
- This Ansbach quest is tied to Freyja : she can also be found in the Specimen Warehouse, and you have the opportunity to report to Ansbach what the woman tells you. By going back and forth between the two characters, you will kill two birds with one stone, making both of them happy.
Thiollier

Once free, Thiollier will open up to you about his obsession with Santa Trina , a personality to whom he has devoted himself and for which he is willing to do anything, even sacrifice his own life. Thiollier will tell you that he has heard rumors of purple flowers to the south , so he will disappear and head in that direction.

- The place Thiollier is referring to is the Cerulean Coast, more specifically the Rift, the southernmost point of interest in this region that hides a rather complex optional dungeon. By reaching this place, Miquella’s seal will be dissolved and it will be possible to access the Rift of Stone Coffins .

- Once you have completed the dungeon and defeated the area’s boss, you will be able to meet a new NPC through which Thiollier’s mission will pass to the next state, namely…
Holy Trinity

Santa Trina is the incarnation of Miquella’s love that the empyrean has freed itself of, a sort of sleep divinity that is entirely made up of the demigod’s love. Thiollier has dedicated his entire life to Santa Trina in the hope of hearing her voice again, and he is willing to commit suicide to make that happen. Thiollier will find himself right next to this character.

- When speaking to Santa Trina the only possible option will be to drink her Nectar, which will kill the protagonist instantly.
- By drinking the Nectar of the Holy Trinity four times in a row , the entity will finally decide to speak with the protagonist. At this point it will be possible to speak with Thiollier about what happened by telling him the verb of his divinity. Thiollier, however, will not take it very well.
- Drinking the Nectar once more, upon awakening you will find Thiollier as an invading NPC . Get rid of your old companion and he will drop the Smile of Santa Trina before leaving the area.
- Now all you have to do is keep drinking the Nectar until Santa Trina repeats the same line of dialogue over and over again, asking you to eliminate Miquella to bring him peace.

- Final Step : After completing the Ruins of Rauh, Thiollier will return to Santa Trina. You must drink the Nectar and speak to him for the last time, telling him the will of his goddess. At that point Thiollier will understand the situation and declare himself your ally, joining your cause.
Freya

Once freed from the spell, Freyja will remember her duties towards General Radahn, but will immediately confirm that she has no intention of putting a spoke in the wheels of Miquella’s company. The Redmane warrior will abandon her initial position, stating that “There is something she absolutely must discover”, heading in the direction of the Keep of Shadows.

- To meet Freyja again you have to start from Miquella’s Cross in the Specimen Warehouse of the Shadow Keep (so the main path, not the one coming from the Church Quarter) and follow the path until you reach the library patrolled by Messmer’s Knights. As in the image above, you will simply have to go up to the higher floors .

- Once you reach the top floor, you will find a place of grace and Freyja (you can already hear her talking as you wander around this place, you will know you are in the right direction). The warrior will be analyzing some steles, but she will literally tell you that: “Ansbach would have been useful to her”.

- Luckily for her and for you, Ansbach is located on the ground floor of the warehouse, in the place we mentioned earlier in this guide. You can go to Ansbach and tell him about Freyja’s request : after you have given the Scroll to Ansbach, he will give you a letter for the girl. Keep going back and forth between the two characters until they either repeat the same sentence over and over or leave the area.
- Final Step (?) : There don’t seem to be any further steps at the moment, because Freyja will be waiting for you in the Chamber of Catharsis shortly before the end of the game.
Led

As a Knight of the Needle, Leda will always remain faithful to Miquella. However, breaking the spell will lead her to look at you with suspicion and consider eliminating several characters during the adventure . From this moment on, you have the opportunity to talk to her to find out which character she considers a threat, after which you can choose whether to defend that character or help her eliminate them, obtaining dedicated rewards. Let’s see the various steps.
Leda wants to eliminate Ansbach
- If you helped Ansbach find the Scroll of the Secret Rite as we indicated in this guide. talking to Leda she will tell you that the man has become a threat. At this point you can go to the Specimen Warehouse, in Ansbach’s room, to find two summoning signs on the ground.
- By defeating Ansbach, you will obtain his Longbow, Leda’s Rune (a normal rune), and a Talisman of the Twisted Tree that increases the damage of hits after dashes and somersaults. However, you will lose Ansbach as an ally in the final battles and give up his very powerful Scythe, which is obtained only at the end of the game.
- By helping Ansbach, Leda will survive and retreat, while you will obtain the Ansbach Longbow and Leda’s Rune. Ansbach’s quest will continue as usual.
Leda wants to eliminate the Herald of the Horn
- Leda may want to turn her blade against the Herald of the Horn. In this case, you will find the summoning signs just before the elevator that leads to the Specimen Warehouse.
- Defeating the Herald will reward you with his set and his weapon, the Falx.
- By helping the Herald you will obtain a Rune of Leda and the War Ash: Quick Cut for light swords.
The ending of Leda’s quest never changes: you will meet her before the final boss.
Characters Outside Miquella’s Company
Count Yimir

After you complete the count’s first request, to ring the bell at the center of the Rhia’s Finger Ruins , he will provide you with a second map to another ruin you haven’t encountered yet. This location is located in the Hinterland, a secret region of Shadow of the Erdtree that you can easily unlock by following our guide to optional regions .

- Looking at the map you can’t go wrong, the destination of your pilgrimage will be immediately clear. All you have to do is reach the center of the Finger Ruins once again and ring the bell that is in the middle . Returning to Ymir, he will tell you that there is a third bell to ring and that tonight could be the right time to communicate with the cosmos. The quest, however, has several outcomes that we have not yet revealed in full, so we will deal with them in order.
First outcome: celestial contact

- Using the place of grace to advance time to night you will find Ymir’s throne empty: interacting with the button on the throne will reveal a passage to the ruins under the Cathedral. Here you will be invaded by the Night Blade Anna, sister of Jolàn. After defeating her you will be able to ring the last bell.
- After ringing the third bell you will be transported to an arena where you will face the optional boss Metyr, Mother of Fingers .
- Final step: Returning to Manus Metyr you will be attacked first by Ymir and then by Jolàn and you will have to defeat both of them. After the battle, you will find Jolàn dying and you can give her an Iris of Grace or one of Concealment : with the first you will get her Ash, with the second her Katana of the Night.
Optional Step (Solved)
- By descending from the Shaman Village in the Hinterland to the top of the Spire of Altus Ombra you can find Anna, Jolan’s sister . If you have given Jolan the Iris of Grace, you can interact with the body to evolve the Summoning Ash so that it summons both sisters, effectively becoming the strongest Ash in the game .
Queenelig

Queelign’s quest ends as it began, without any honor or glory. After you have dealt with the invader in the two locations where he attacks you, Belurat and the Altus Crusade Church, this character will move to the Shadow Keep Church Quarter , reachable through the rear entrance of the Keep near the Manus Metyr Cathedral.

- From the Church Quarter (when it’s still flooded, otherwise you can use the elevator in the main hall) you need to drop down from the roof inside the Church and you’ll immediately find yourself next to a wooden door that you can open with the Prayer Hall Key (obtained automatically after defeating Queeelign twice) to find the very weak Queelign inside.
- Final Step : Queelign will beg you to see the grace and you will have two options. If you give him an Iris of Grace he will give you his Ash of Summoning , if you give him the Iris of Concealment he will reward you with his Greatsword .
Priestess of the Draconic Communion and Igon

The Priestess and Igon quest has two paths with completely different rewards that are quite complex to obtain, so we encourage you to follow the next steps with great attention. Both outcomes have to do with defeating Bayle, so what matters is what you did before facing the ancient dragon.
Standard Final
- To get this ending, you simply have to fight Bayle as requested by Igon and return to the Priestess . She will reward you with her Heart, which allows you to transform into an Elder Dragon, and her Mace, which is nothing special.
Secret Ending
- To get this ending you must reach the Priestess during the night before defeating Bayle . Once there you will be able to hear her talking to Placidusax, and approaching you will have the option to give her Thiollier’s poison . In this guide we have explained how to get the poison, which can only be taken while Moore is still at the place of grace in front of Belurat. By giving her the poison, the priestess will fall asleep.
- After speaking to her, you must defeat Bayle with Igon and then return to her. You will not get the Heart or the Mace, but you will get Florissax’s Lightning Spell . Also, if you confess that you were the one who put her to sleep, she will swear to follow you into battle and will give you her Summoning Ash .
FINAL POINT OF NO RETURN

Once you reach the grand staircase at the bottom of Enir Ilim’s Legacy Dungeon, you’re just a few steps away from the final point of no return for any side quests . At the top of that staircase is a final resting place called the “Chamber of Catharsis,” beyond which all matters will come to a head and virtually every NPC in the game world will either die or pass on to their final state. What exactly happens, and why does it matter?

In the Chamber of Catharsis you will have to face a battle with Miquella’s supporters who will try to prevent me from reaching the empyrean. This means that all the members of the company still alive and who are not your allies will attack you en masse : by default these will be Leda, Dane and Moore, while the fate of all the others depends on the missions you have completed and how you have done them. Anyone who participates in this fight will leave their armor set and their weapon after the conclusion.
Now do you see why the quests are structured this way? Pushing Leda to eliminate some companions, for example, can mean that you don’t have to defeat them in this fight. Helping Thiollier find Santa Trina will prevent him from participating in the fight, siding with Ansbach will mean that he will help you in the battle… and so on. All the quests are intertwined because they lead to this moment.
Also Read: